
WSL2: Running containerized solutions on Visual Studio without Docker Desktop
Introduction
With the advent of containerization, Docker and Docker Desktop came in and provided GUI-based simple solutions for most of the problems that a developer would face in setting up a local development environment. But with the news that broke out last year (2021) that Docker Desktop will no longer be free for an Enterprise setup, although it is still free for personal use.
Therefore, looking out for alternate strategies as of right now, in this article we would be looking forward to setup Visual Studio with WSL2. So, that we could leverage the same without Docker Desktop in Visual Studio 2022 on a Windows machine.
Note: If you have not set up WSL, you can refer to this article for setting it up before we continue.
Configuration
Over here we are going to leverage the caveat that only Docker Desktop needs a license to be used in a commercial setup and not the actual docker services which we will be hosting in our WSL setup. Noting, that it was always possible in Docker Desktop to integrate it with WSL but we generally never choose to do so! So, let’s begin with configuring docker in our WSL2 setup on Ubuntu.
Configure Docker
-
Update the apt package index and install packages:
sudo apt-get update && \ sudo apt-get install ca-certificates curl gnupg lsb-release -y -
Add Docker’s official GPG key:
curl -fsSL https://download.docker.com/linux/ubuntu/gpg | sudo gpg --dearmor -o /usr/share/keyrings/docker-archive-keyring.gpg -
Set up Docker’s stable repository
echo "deb [arch=$(dpkg --print-architecture) signed-by=/usr/share/keyrings/docker-archive-keyring.gpg] https://download.docker.com/linux/ubuntu \ $(lsb_release -cs) stable" | sudo tee /etc/apt/sources.list.d/docker.list > /dev/null -
Install Docker Engine and packages that go along with it
sudo apt-get update && / sudo apt-get install docker-ce docker-ce-cli containerd.io -y -
Start the docker service
sudo service docker startIf by any chance you are happen to install
Ubuntu 22.04or above, you will notice that even after running the above command the service would not start, the reason being the OS usesiptables-nftby default. Therefore, to fix it you would have to switch toiptables-legacyand to do so follow the following:sudo update-alternatives --config iptablesThe above command would list the list of iptables available, select
1and hit enter to continue. Repeat step 5 of starting the service and move further.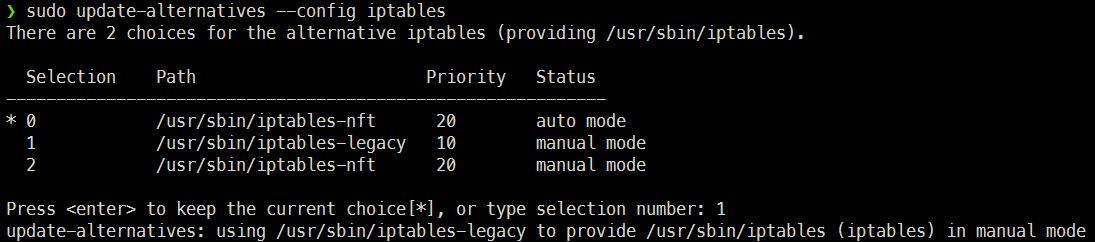
Selecting iptables -
Verify that Docker is installed correctly
sudo docker run hello-world
Configure .NET 6.0
To be able to run and build the services on docker, we need to install dotnet on WSL setup of Ubuntu as well. First, we would need to check on the official provider, if the version of dotnet we wish to install is supported on the version on Ubuntu we have installed. Here, we use Ubuntu 20.04 which is supported, therefore continuing…
-
Add the Microsoft package signing key to your list of trusted keys and add the package repository.
wget https://packages.microsoft.com/config/ubuntu/20.04/packages-microsoft-prod.deb -O packages-microsoft-prod.deb && \ sudo dpkg -i packages-microsoft-prod.deb && \ rm packages-microsoft-prod.deb -
Install the SDK - The .NET SDK allows you to develop apps with .NET. If you install the .NET SDK, you don’t need to install the corresponding runtime.
sudo apt-get update; \ sudo apt-get install -y apt-transport-https && \ sudo apt-get update && \ sudo apt-get install -y dotnet-sdk-6.0 -
Install the runtime - The ASP.NET Core Runtime allows you to run apps that were made with .NET that didn’t provide the runtime. The following commands install the ASP.NET Core Runtime, which is the most compatible runtime for .NET.
 sudo apt-get update; \
 sudo apt-get install -y apt-transport-https && \
 sudo apt-get update && \
 sudo apt-get install -y aspnetcore-runtime-6.0
As an alternative to the ASP.NET Core Runtime, you can install the .NET Runtime, which doesn’t include ASP.NET Core support: replace aspnetcore-runtime-6.0 in the previous command with dotnet-runtime-6.0:
sudo apt-get install -y dotnet-runtime-6.0 -
Verify .NET installed successfully - Running the following command should tell you the version of .NET installed on the machine.
dotnet --version
Configuring Visual Studio 2022
-
Now, let’s set up Visual Studio 2022 and build our sample Hello-World Console App With Visual Studio. It is the template console app created by Visual Studio.
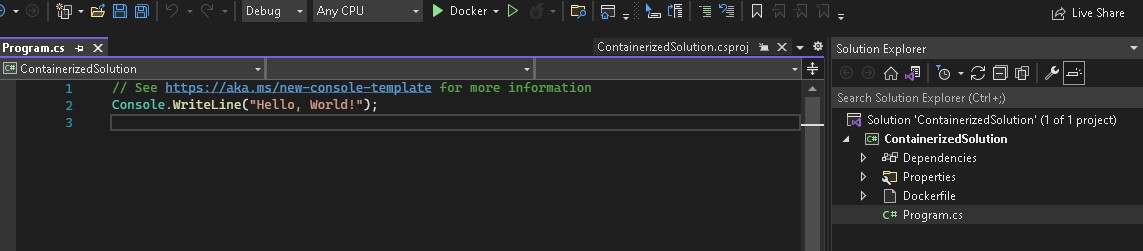
Console App Setup -
Add Docker Support - This creates the Dockerfile automatically in the solution
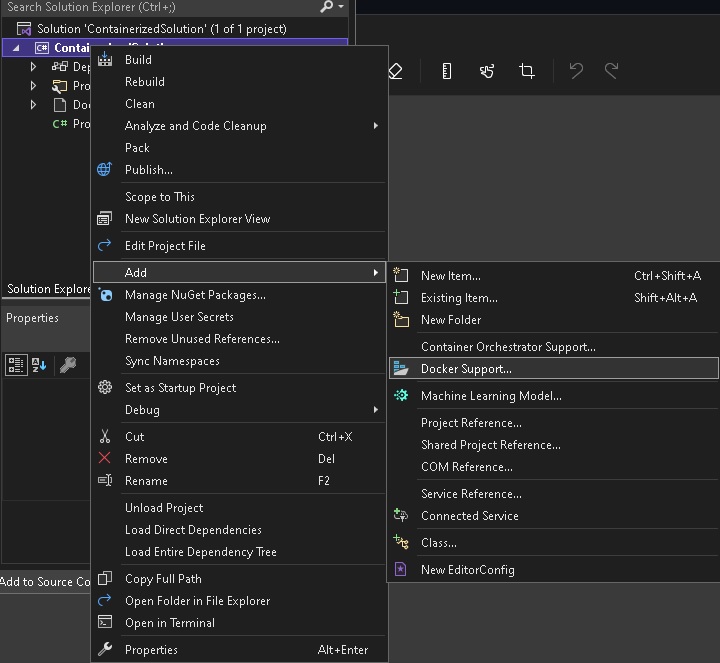
Add Docker Support For simplicity, we are using the generic docker file that is created by Visual Studio itself:
FROM mcr.microsoft.com/dotnet/runtime:6.0 AS base WORKDIR /app FROM mcr.microsoft.com/dotnet/sdk:6.0 AS build WORKDIR /src COPY ["ContainerizedSolution/ContainerizedSolution.csproj", "ContainerizedSolution/"] RUN dotnet restore "ContainerizedSolution/ContainerizedSolution.csproj" COPY . . WORKDIR "/src/ContainerizedSolution" RUN dotnet build "ContainerizedSolution.csproj" -c Release -o /app/build FROM build AS publish RUN dotnet publish "ContainerizedSolution.csproj" -c Release -o /app/publish FROM base AS final WORKDIR /app COPY --from=publish /app/publish . ENTRYPOINT ["dotnet", "ContainerizedSolution.dll"] -
Select WSL to run the application - Visual Studio 2022 automatically detects WSL setup on your machine
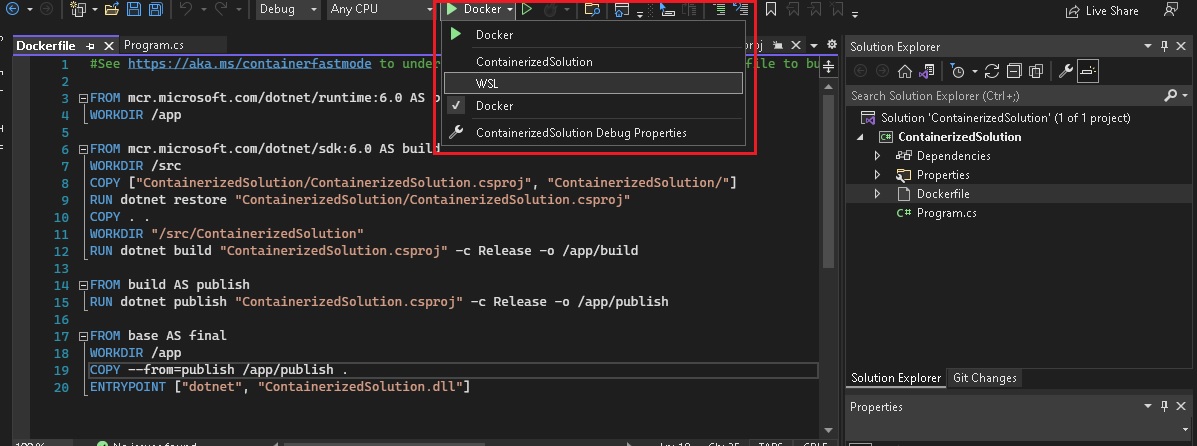
Run with WSL -
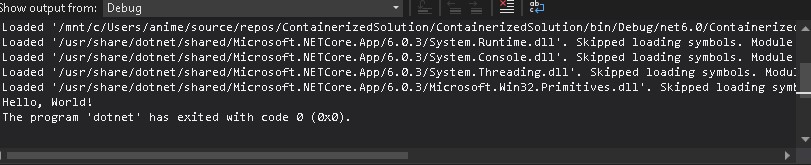
Run the application - The sample application is run and we can see the result in the output window
Successful Run
Now, we have successfully set up WSL2 and can run containerized solutions via visual studio directly over there. Happy containerizing without Docker Desktop on Windows!!
Comments